By: Melissa Coleman Last Updated: Sep 27, 2023 This post may contain affiliate links.
Looking for a fun weekend project? Learn how to build a cornhole board with these easy step-by-step instructions and let the backyard tournaments and games with family and friends begin.
The best thing about this build is that it requires very minimal woodworking experience using simple basic tools.
With just a little bit of time and a small investment, you can customize a set of boards that will last you for years to come.
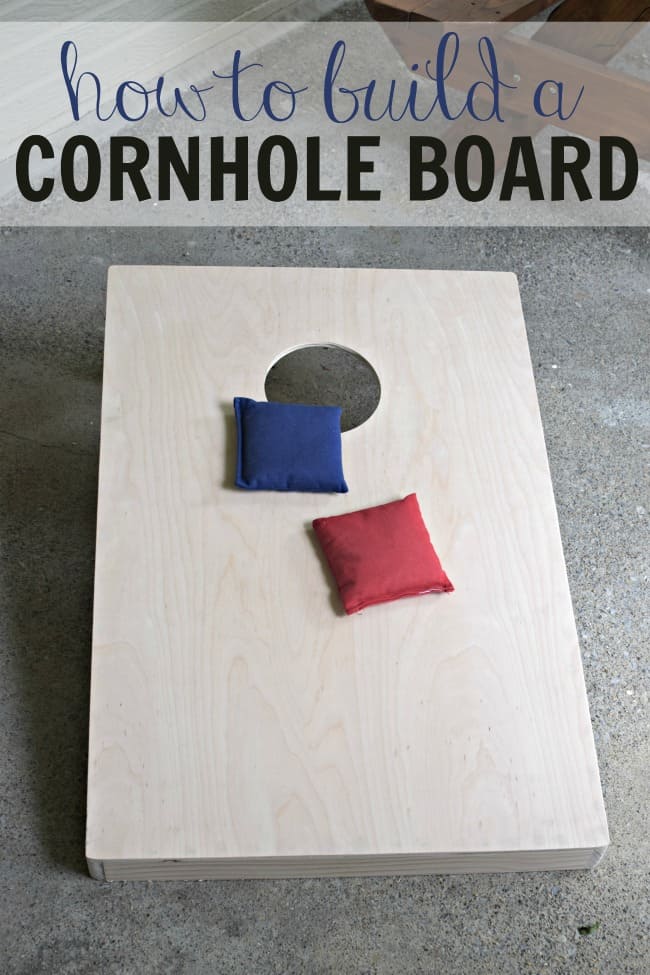
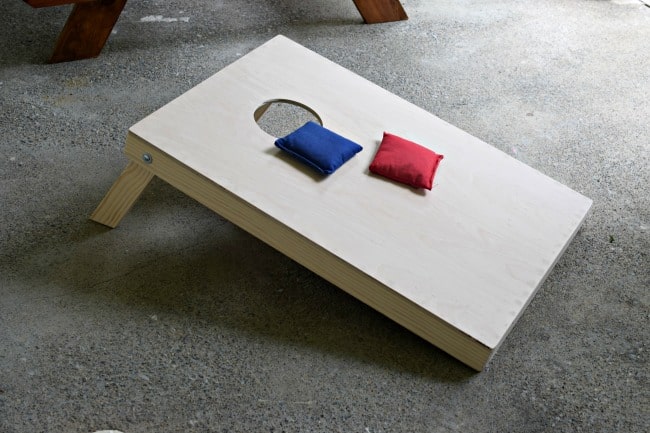
This cornhole game set is made of real wood and is solid and strong.
Sure you could buy a set but have you checked those prices? This one will cost you less than $50 for both boards. **Note** Pricing is dependent on the cost of wood.
These plans are not for a regulation board but I have answered a few questions below in the FAQs if you are looking for those measurements.
Optional (for a portable board)
NOTE: These directions are for a 3-foot board. If you want to go regulation size you will want to cut your board at 4 feet and then adjust the measurements for your other boards as well.
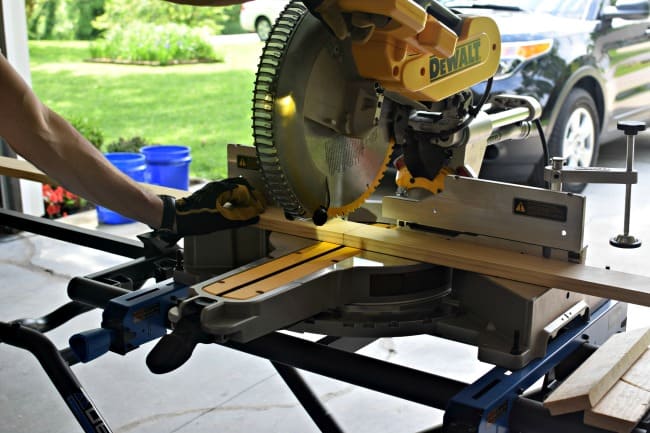
Cut your plywood down to 2' x 3'. This will be the cornhole board length.
We used a table saw to cut this out but you could also use a circular saw. If you don't have either your local home improvement store will also make these cuts for you.

Cut your frame pieces.
We used 1 x 3 x 8 boards to keep them lightweight. You could also use 2 x 4.
This would likely cut down on the cost if you aren't worried about the portability.
The frame pieces are 36 x 24. You will need (4) 36" pieces and (4) 24" pieces and (2) 23" pieces for the middle supports.
We attached our frame pieces using wood adhesive and pocket holes to hold the frames together.
The middle braces are placed in the middle of the frame.
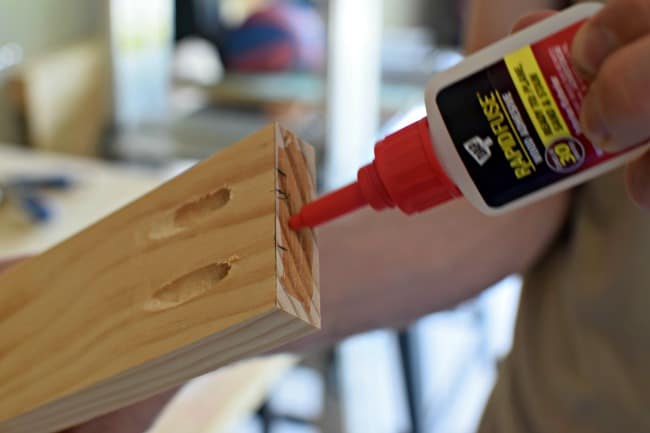
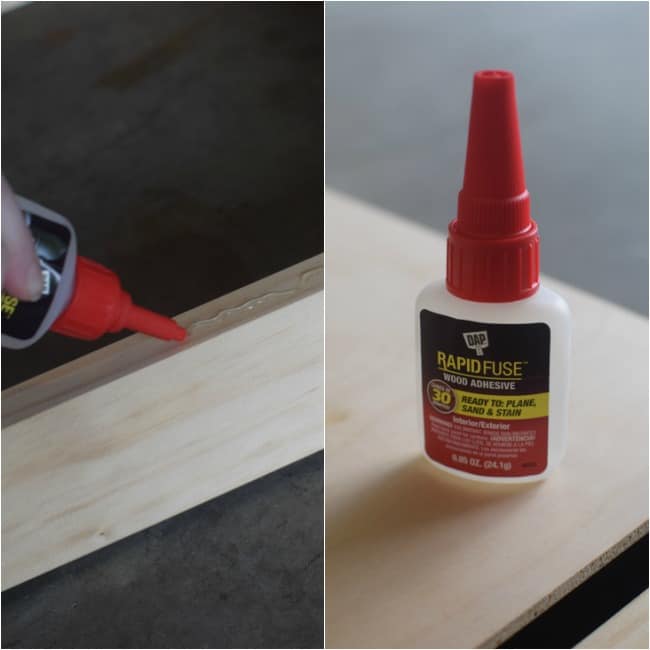
We also attached the plywood to the frame using DAP ® RapidFuse™ Wood Adhesive and a few brad nails.
We like using DAP ® Products because they are a trusted brand for more than 150 years and I know my cornhole board will hold up for a long time.
RapidFuse needs 30 minutes to set and then you are ready to sand, stain, and plane all without damage. Which leaves your end result clean, tight, and water-resistant.
It is also stronger than your average yellow glue with no swelling, shrinking, or cracking.
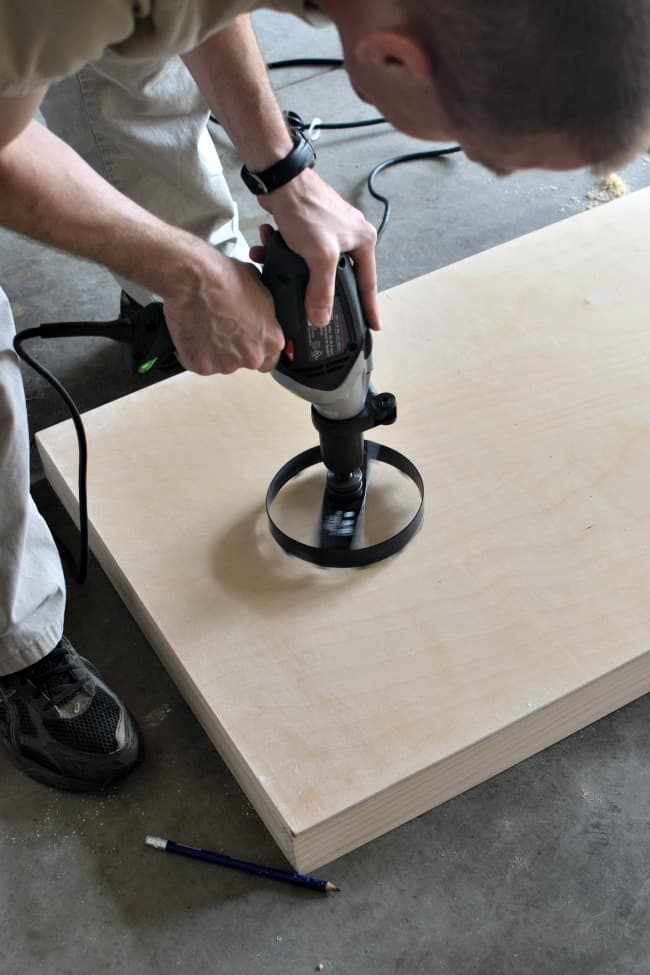
Next, we drilled our 6" holes using a 6" hole saw.
I highly recommend this method over trying to jigsaw out the circle. The center should be 9" from the top of the board and centered from the sides.
NOTE: The wood will try to splinter so be sure to drill from the top (the good side) of the frame down.
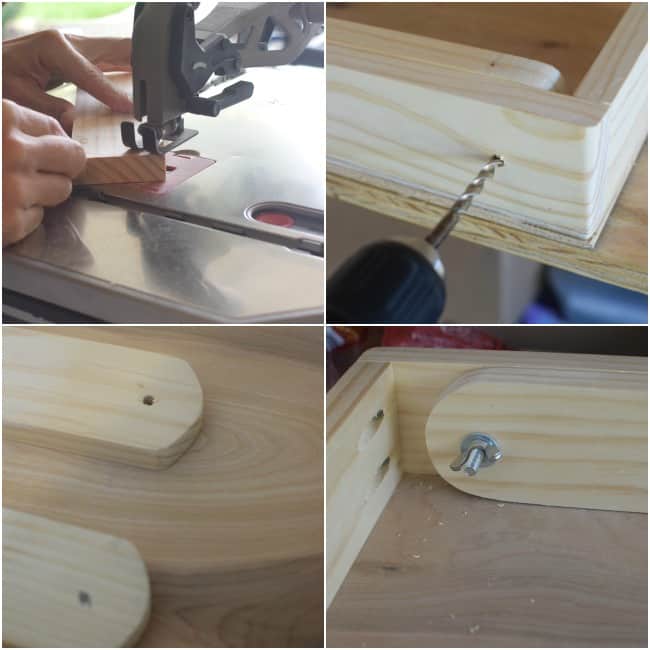
Now it's time for the cornhole board leg dimensions.
We cut the legs at 16 inches, rounded out the tops so they would be able to turn, drilled the holes for the carriage bolts (with enough room for the legs to swing back), and attached them.
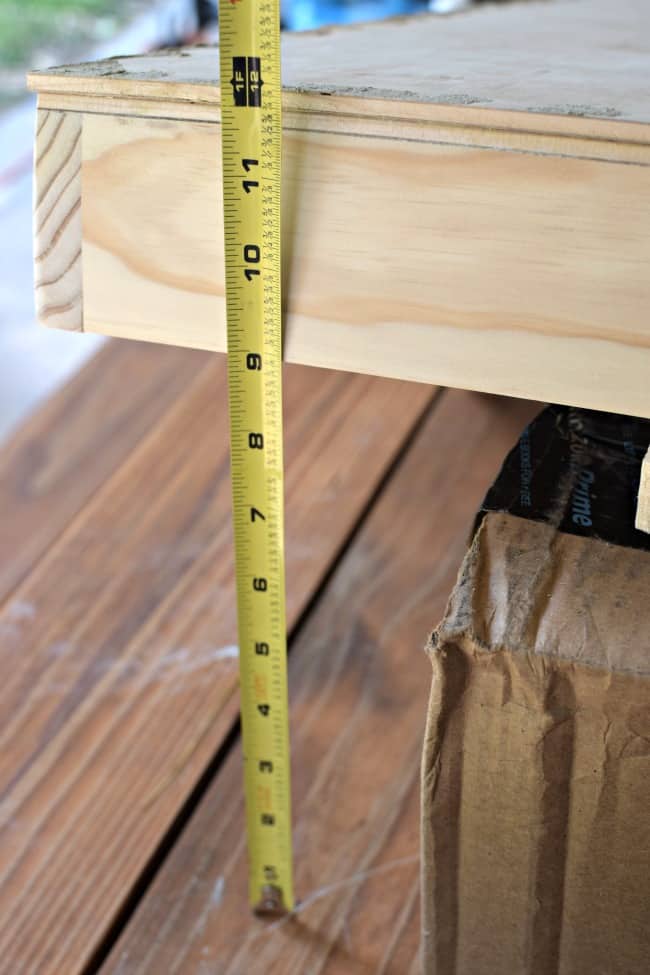
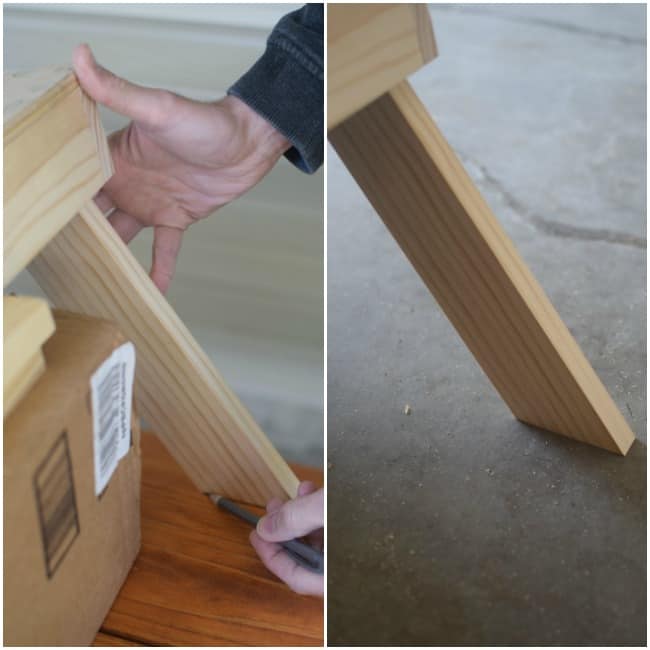
Then we set the board up so that the back measured 12" off the ground (the regulation height) and swung the legs (fully extended) off the side of the table so we could mark the slant that it needed to be cut.
We found this to be the easiest method but there are all sorts of different ways you could go about doing the legs.
Once you cut your legs and attached them back to the board using the washers (1 large on the outside, 2 small between the frame and leg, and 1 between the wingnut and leg) you are all done.
Well, sort of all done. You will want to give your boards a good sanding as per most wood projects.
Now that you have your boards completed the hardest part is deciding what color cornhole bags you want to get and how you want to paint or stain your boards.
I'm still debating the stain or paint option, there are so many ways you can have personalized cornhole boards.
Also, I mentioned that we made these boards portable and that you would need rope, hinges, and catches for that option.
If you want to complete this step you will attach the hinges and catches to one side so that they will lock together. We attached the rope to make them easier to carry.
The official cornhole board dimensions should be 48" by 24" with a 6" hole centered 9 inches from the top edge.
The top edge is to be 12" from the ground and the bottom 4" from the ground.
We followed most of those rules with an exception of one, the length. We decided to make our board lighter weight and more portable by making it 3 feet instead of the 4. We had no intentions of using it in an official setting.
For adults, there should be 27 feet between each board. For younger children, there should be 12-15 feet between each board. These are the rules for regulation but if you are just playing with family and friends make them work for your party.
As stated in the step-by-step instructions, you will cut the hole with a 6-inch hole saw.
You will need to cut the legs at an angle so they rest evenly on the floor. They typically need to be cut at an angle of about 8 degrees.
Reynolds Bags are one of the most played ACL-certified bags on the professional circuit. Another widely used bag brand is Pro Advantage.
As you use the board it will become less slippery but you can also try switching your bags to something like 100% duck cloth bags.
Yes, this will help protect your cornhole boards for years to come.
Cornhole Ideas for Personalizing your build!
More Woodworking Projects
Want to print or save these instructions?